Configure credentials using CLI
Install, Update, and Configure the CLI
To use the Code Pipes CLI, you need to install it on your Linux or macOS system and configure it with the appropriate endpoint. Follow the instructions below to install, update, and configure the CLI.
Install or Update the CLI
Please note that the installation process currently only supports Linux and macOS systems. Make sure you have the following requirements met:
curlandunzipare installed and in your system's path.- You have
sudoaccess.
For macOS
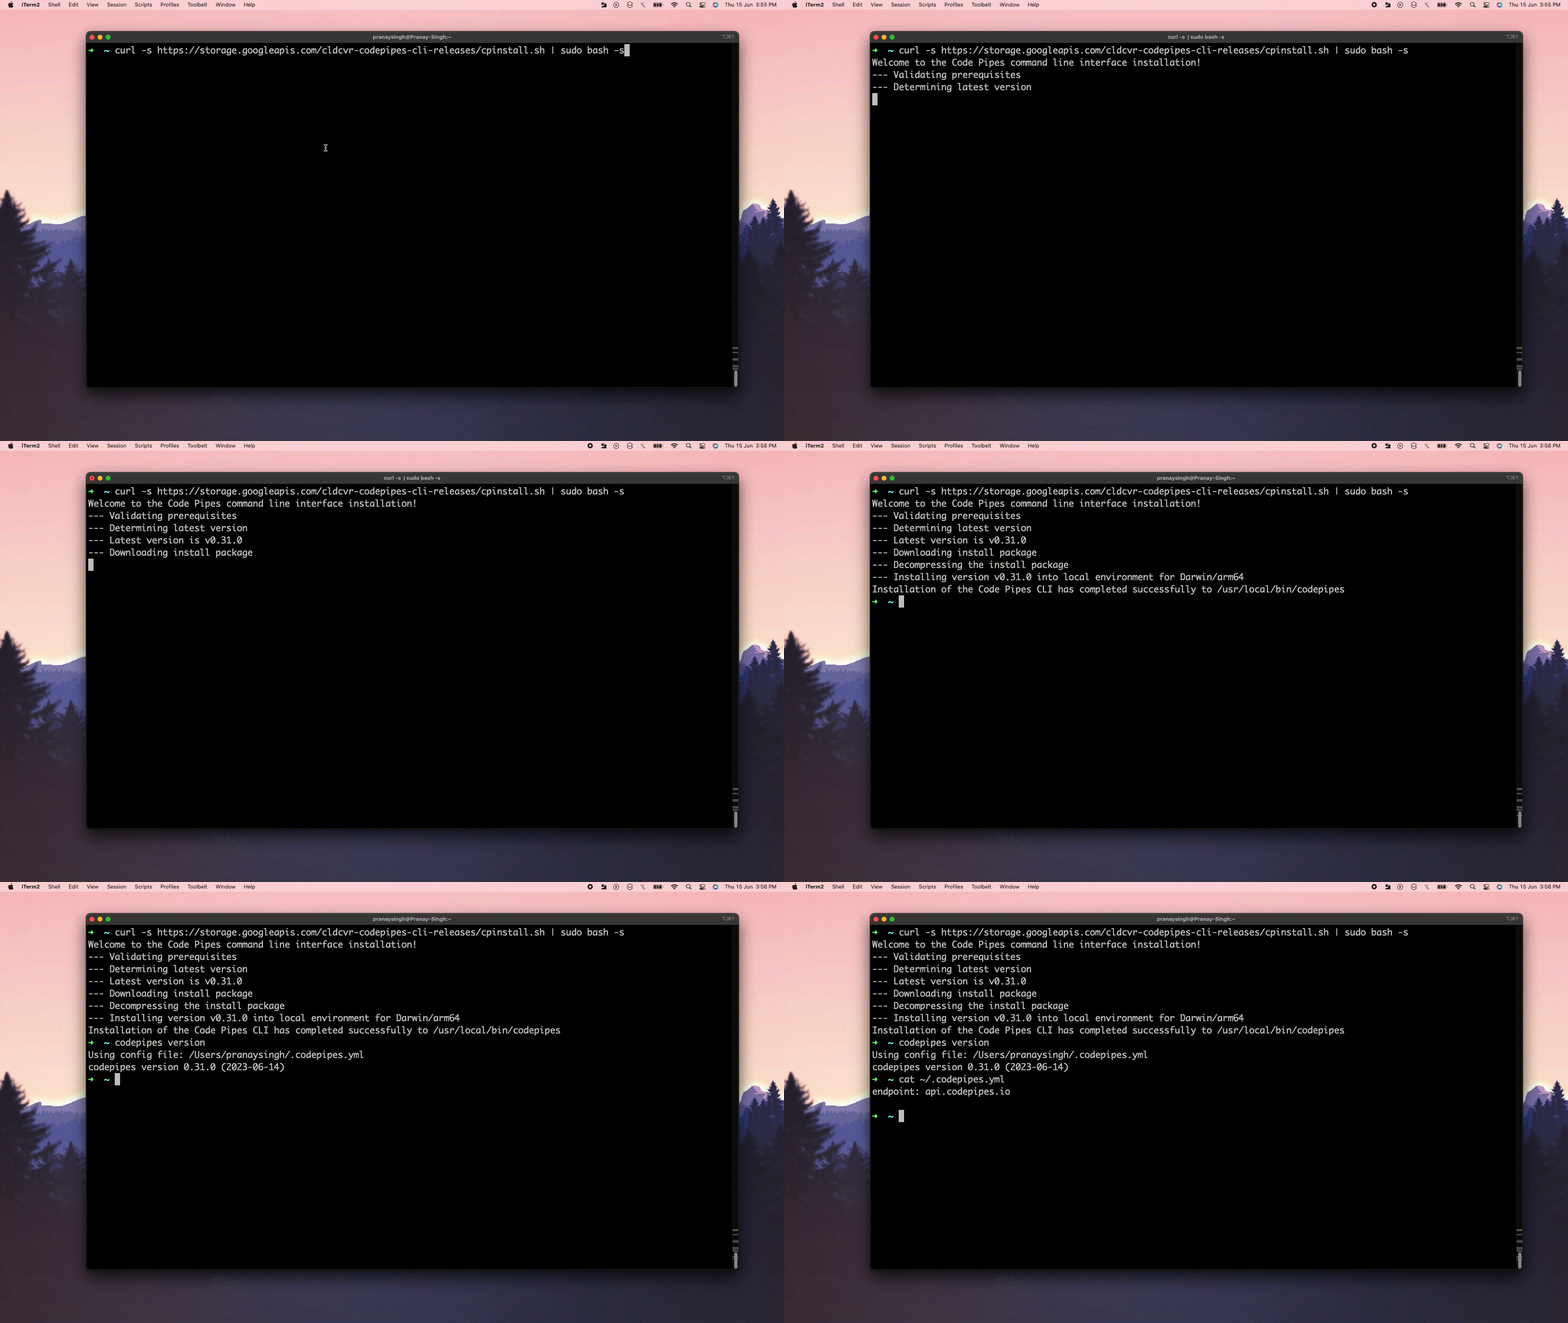
To install or update the CLI on macOS, run the following command in your terminal:
curl -s https://storage.googleapis.com/cldcvr-codepipes-cli-releases/cpinstall.sh | sudo bash -s
After executing the command, you will see the installation progress and a confirmation message once it is completed. The CLI will be installed in the /usr/local/bin/codepipes directory.
For Linux
To install or update the CLI on Linux, run the following command in your terminal:
curl -s https://storage.googleapis.com/cldcvr-codepipes-cli-releases/cpinstall.sh | sudo -E --preserve-env=PATH bash -s
After executing the command, you will see the installation progress and a confirmation message once it is completed. The CLI will be installed in the /usr/local/bin/codepipes directory.
Configure the CLI
To configure the CLI, you need to set the endpoint where the backend APIs are running. Follow the steps below:
-
Open the default configuration file located at
~/.codepipes.yml. -
Add the following line to the file to set the endpoint:
endpoint: api.codepipes.ioThis sets the endpoint to
api.codepipes.io, which is the default endpoint for the Code Pipes API.
By configuring the CLI with the appropriate endpoint, you ensure that it connects to the correct backend APIs.

After following these steps, you should have the Code Pipes CLI installed, updated, and configured on your system. You can now use the CLI to interact with Code Pipes and perform various operations.
Updated over 1 year ago
